

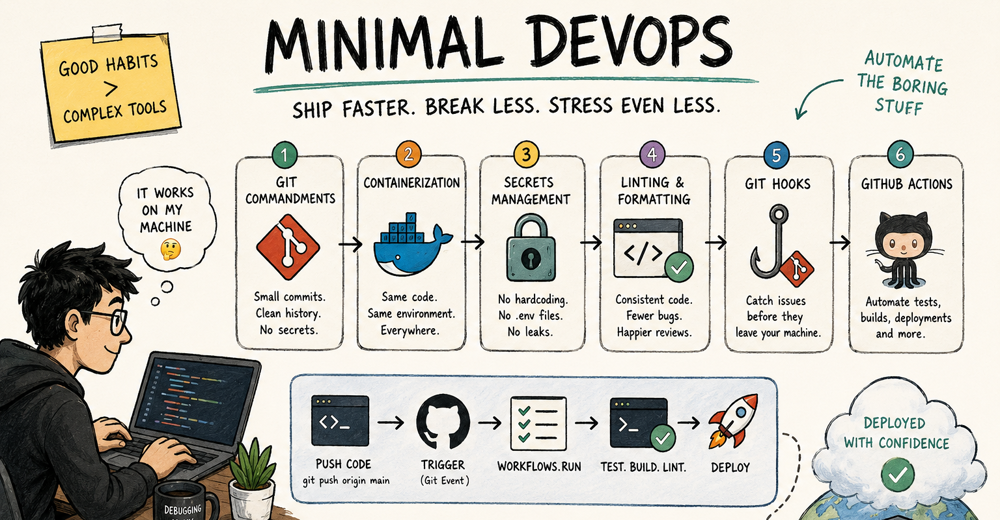
What comes to your mind when you hear the word "DevOps"?
It's either a sh*t show of Kubernetes clusters... or you throw your app onto a managed platform like Vercel, Railway, or Netlify and call it a day.
Today, as a broke smart developer, I'll teach you how to do minimal DevOps as a developer without emptying your pockets or ruining your mental peace.
And yeah it goes much deeper than just using Docker.
What is DevOps and why should you care?
Remember the last time you pushed a feature, only for something completely unrelated to break? Or when your app worked perfectly on your machine but refused to run anywhere else?
As your projects grow, writing code slowly becomes the easiest part.
Building it, testing it, deploying it, managing servers, handling secrets, rolling back bad releases, and making sure everything keeps running become problems of their own.
That's exactly the problem DevOps tries to solve.
AWS defines DevOps as:
DevOps is the combination of cultural philosophies, practices, and tools that increases an organization's ability to deliver applications and services at high velocity.
That's the textbook definition.
In simple words, DevOps is just a collection of practices that help teams ship software faster, more reliably, and with fewer "it worked on my machine" moments.
And congratulations, you now have the answer to that interview question.
DevOps becomes even more important in smaller teams, where the line between a developer and a DevOps engineer is often blurry.
More often than not, the same person is responsible for everything from writing code to deploying it and making sure it stays online.
That doesn't mean you need to become a DevOps engineer. But every developer should be comfortable with at least these core practices:
- Version Control Everything
- Automated Testing
- Continuous Integration (CI)
- Continuous Delivery/Deployment (CD)
- Containerization
- Monitoring and Observability
- Security by Design
- Secrets Management
- Automated Rollback and Recovery
The tools will change depending on your stack, your team, or your company. The ideas stay exactly the same.
Let's go through the ones every developer should know, starting with CI/CD.
CI/CD
Imagine you're working on a project with four other developers.
Everyone writes code differently. Everyone has a different setup. One person forgets to run the tests, another skips formatting, someone else deploys from their local machine, and before you know it, your production server has become the testing environment.
That's the mess CI/CD was created to fix.
A CI/CD pipeline automates everything that happens after you push your code, making software releases faster, safer, and far less stressful.
Continuous Integration (CI) is all about making sure every change you push plays nicely with the rest of the code base.
Instead of everyone manually figuring out how to build, test, and validate the project, every developer works independently on their own branch. When they're ready, they open a Pull Request and an automated pipeline takes over.
It can install dependencies, build the project, run linting and formatting checks, execute unit and end-to-end tests, and verify that nothing is broken before the code is merged.
This lets developers work in parallel without constantly worrying about breaking someone else's work.
Once your code has successfully passed all the checks, it's ready to be deployed.
The Continuous Delivery / Continuous Deployment (CD) stage ensures that you have everything you need to get your app running. That might include building Docker images, provisioning infrastructure, deploying to staging or production, running database migrations, or updating cloud resources.
Instead of someone manually logging into a server and hoping they didn't miss a step, the same deployment process runs every single time.
Fewer manual steps means fewer mistakes.
Now that we've covered the textbook idea behind CI/CD, let's look at how you can apply these practices in your own projects.
Git Commandments for CI/CD
Before you automate deployments, you need to automate discipline. A CI/CD pipeline is only as good as the code that goes into it.
Here are my personal non-negotiables that will save you (and your teammates) from countless headaches.
- Make small commits. They're easier to review, easier to test, and much easier to roll back if something goes wrong.
- One commit, one logical change. Don't mix a bug fix, a refactor, and a new feature into the same commit.
- Write descriptive commit messages. Follow a consistent format like Conventional Commits. Tools like Better Commit can generate properly formatted commit messages for you.
- Agree on a workflow before writing code. Whether it's branching strategy, naming conventions, or code reviews, everyone should follow the same process before merging into a shared repository.
- Protect your important branches. Enable branch protection rules so nobody can accidentally push directly to main or delete a production branch because "they thought they were on another branch."
- Prefer a Monorepo when multiple projects evolve together. If your frontend, backend, shared packages, and infrastructure are tightly connected, tools like Turborepo or Nx can make development much simpler than juggling multiple repositories.
- Always Initialize a workspace with a .gitignore : Accidentally pushing node_modules, .env, build artifacts, or IDE files is a mistake you don't wanna make. Trust me, you don't want your next GitHub issue to be someone politely informing you that your OpenAI API key is public.
Multi-Environment Deployments (Dev, Stage & Prod)
Let's talk about environments.
When you're building your first side project, you usually have just one version of your app (the live one).
Every new feature, bug fix, or experiment goes straight there.
That works... until it doesn't.
As your application grows, a single production environment becomes risky.
One bad deployment can break payments, crash your API, or ruin a customer demo five minutes before it starts.
This is why almost every serious software team uses multiple environments.
A common setup looks like this:
- Development – where new features are built and tested every day.
- Staging – an environment that closely mirrors production, where your team can verify everything before releasing it.
- Production – the version your actual users interact with.
Now imagine you've just merged a Pull Request into your staging branch.
Instead of someone manually copying files to a server, a deployment pipeline automatically builds your application, packages everything it needs to run, deploys it to the staging environment, and gives your team a URL to test.
If everything looks good, the exact same process can deploy that same build to production.
Platforms like Vercel, Railway, and Netlify do this for you out of the box by automatically creating preview deployments for every Pull Request.
If you're into sefl-hosting, tools like Caddy or Nginx can route traffic to different deployments using subdomains or reverse proxies.
If you want the best of both worlds, tools like Dokploy and Coolify are also viable options.
Here's how you can configure preview deployments in Dokploy.
https://docs.dokploy.com/docs/core/applications/preview-deployments
The tools may differ, but the core idea is this:
Every change gets tested in an isolated environment before it reaches your users.
Containerization should be the norm
Containerization is the answer to the age-old question:
"But... it works on my machine."
The goal is simple:
If two people have the same code and the same configuration, they should get the exact same application running every single time.
That's called consistency, and it's one of the biggest reasons containers became the standard.
I can't count how many times a colleague pulled my branch (or I pulled theirs), only for us to spend the next two hours debugging why it worked on one machine but not the other.
Wrong Node version.
Different Python runtime.
An outdated Postgres image.
A package behaving differently because someone's environment was slightly different.
That was my life before Docker.
Now every project starts with a Dockerfile and a compose.yml.
A teammate clones the repository, runs a single command, and within a few minutes they're running the same application, with the same runtime, the same dependencies, the same database version, and the same supporting services as everyone else on the team.
I can't blame their setup for my bugs anymore. :(
Docker made this possible.
The best part is that the same containers you run on your laptop can also run in the cloud. Whether you're deploying to AWS, Azure, Google Cloud, or your own VPS, almost every platform today knows how to run containers.
Before we go any further, let's clear up a few terms that people often mix together.
- A container is a running, isolated instance of your application.
- An image is the blueprint used to create that container.
- A Dockerfile is the recipe that tells Docker how to build the image.
- A compose.yml file describes how multiple containers (your app, api server, database and other services) should run together.
- Docker is the most popular container engine, but it isn't the only one. Alternatives like Podman exist too. Hell, even Apple has an open source container engine. Hard to believe right.
- A container registry is simply a place to store and share container images. Docker Hub, GitHub Container Registry, and AWS ECR are some of the most common ones.
Once you understand these building blocks, deploying your application becomes much simpler. Instead of saying "run these 17 setup commands before starting the project," you just ship the container.
From there, whether you're deploying a single container to a VPS or orchestrating thousands of them with Kubernetes on services like Amazon EKS, you're still working with the exact same idea: package your application once, then run that same package everywhere.
Keep your secrets safe
In our Git Commandments section, we talked about never committing secrets to GitHub, whether they're hard-coded into your source code or sitting inside a .env file.
Always remember: once something reaches the internet, you should assume it's there forever.
Keeping secrets out of Git is only half the battle, though.
The other half is managing them.
Early on, our workflow looked something like this:
- Zip the .env file.
- Email it.
- Send it over Microsoft Teams.
- Forward it on WhatsApp because someone couldn't find the email.
- Copy the same values into the staging server.
- Copy them again into production.
- Repeat the whole process the next time an API key changed.
We did this multiple times every month.
We were an early-stage startup, feature requests changed every other week, and our free startup credits kept pushing us from one cloud provider or service to another.
Every switch meant new credentials and another tedious round of updating .env files everywhere.
And yes, sometimes we'd hard-code an API key just to quickly prototype a feature or demo something to stakeholders.
It was a complete mess.
One forgotten environment variable or one wrong API key in production was enough to bring the application down.
That's why secrets managers exist.
Instead of manually sharing and copying sensitive values everywhere, tools like Doppler, AWS Secrets Manager and HashiCorp Vault securely store your secrets and inject them into your application only when it's running.
Every new developer joining the team gets the latest updated secrets.
Nothing in production breaks.
Your Git repository never sees anything it doesn't need to.
Everything stays in sync automatically.
It's one of those things that feels unnecessary when you're working alone, but once you've worked on a real team, you'll never want to go back.
Linting and Formatting
I've tweeted this a while ago, and it still holds true to this day.
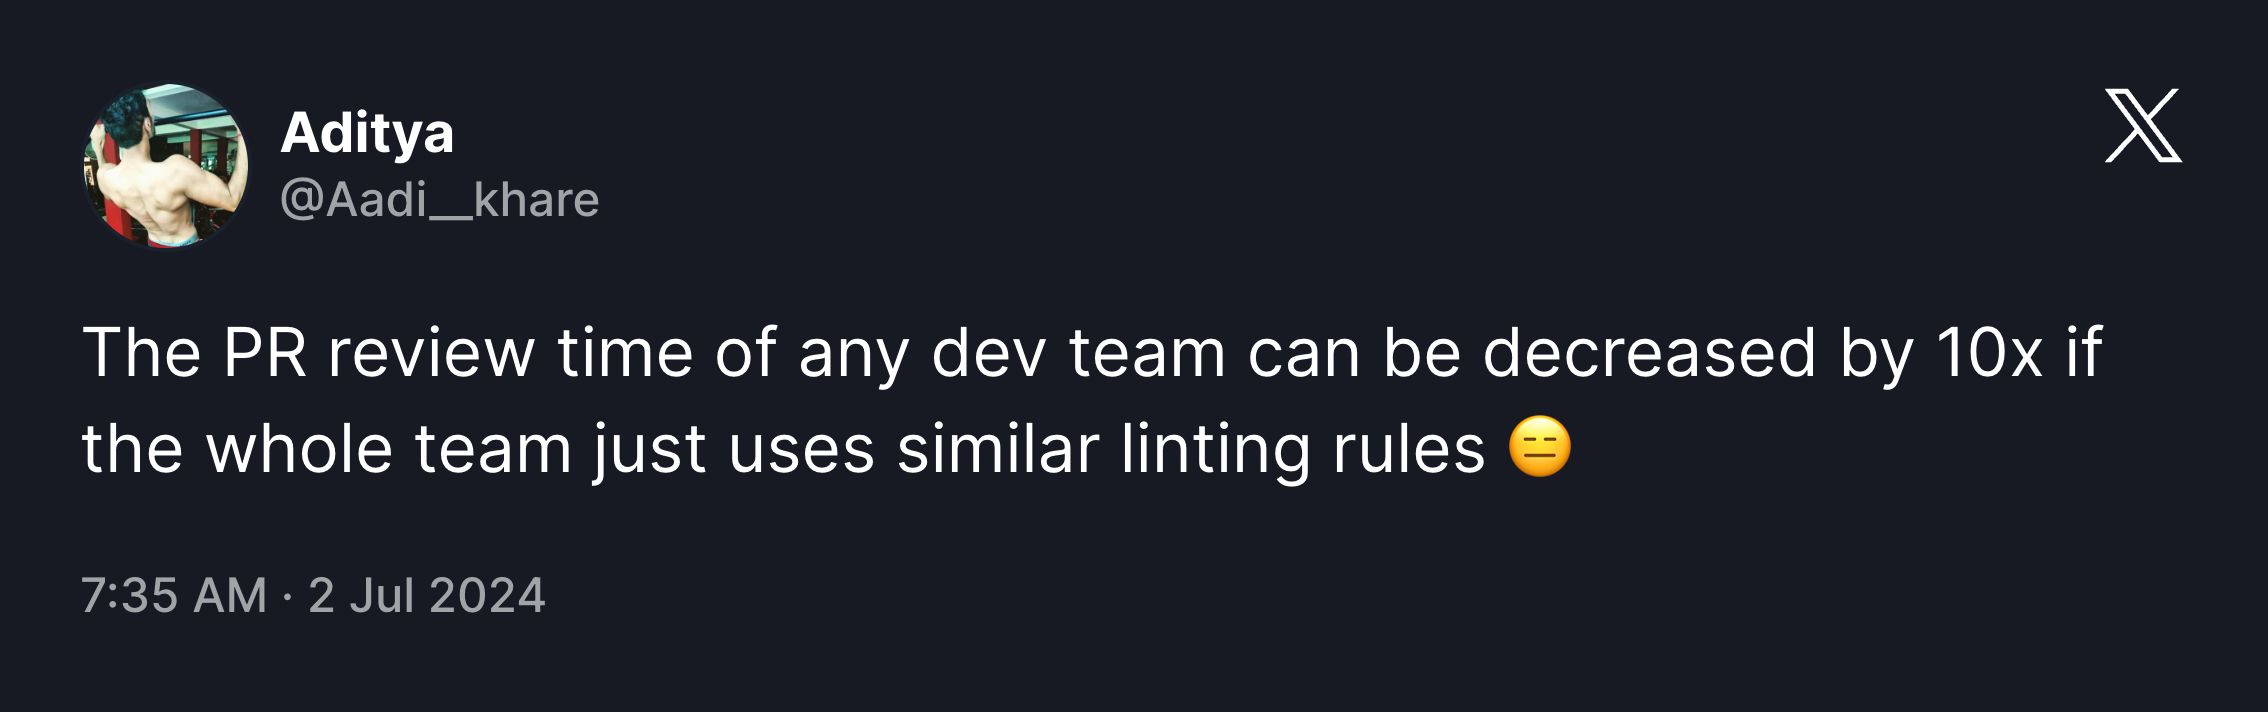
Most developers think linting and formatting is just an opinionated 'clean code' practice like spaces vs tabs (spaces obviously).
They're not.
They're about removing pointless discussions from code reviews.
A few years ago, I reviewed an intern's Pull Request that was well over 1,200 lines long.
Halfway through the review I realized almost every changed line existed because their editor wasn't adding semicolons while the rest of the project expected them. Git saw every one of those formatting changes as an actual code change.
The scary part?
That PR almost made it to production.
Not because the feature was bad, but because buried inside hundreds of unnecessary formatting changes was the actual business logic I was supposed to review.
Never again.
Today, every project I work on has formatting and linting configured from day one.
Tools like Prettier and Biome automatically format your code so everyone writes in the same style.
Linters like ESLint and Oxlint catch common mistakes, bad practices, unused variables, and potential bugs before another human even looks at your Pull Request.
Use these with the Ultracite preset and you're golden.
The goal isn't prettier code.
The goal is making sure every Pull Request (whether it's coming from a fresher or an experienced dev) only contains the changes that actually matter, making reviews faster, bugs easier to spot, and your teammates a little less grumpy.
Git hooks
Even with good formatting rules, there's just one tiny 🤏 problem.
They only work if people remember to run them, which most devs usually don't 🙂.
Developers are busy.
Sometimes you're rushing to fix a production bug.
Sometimes you're committing code at 2 AM after spending four hours chasing a race condition.
Sometimes talking to a REAL human on a virtual call is unavoidable 😰
The last thing on your mind is running five different commands before every commit.
That's where Git Hooks come in.
Git Hooks let you automatically run scripts whenever certain Git events happen.
The most popular one is the pre-commit hook.
Before Git creates the commit, you can automatically:
- Format your code.
- Run your linter.
- Execute type checks.
- Run a small test suite.
- Prevent secrets from being committed.
- Reject commits that don't follow your team's conventions.
The best part is that developers don't have to remember any of it.
It just happens.
A popular tool for managing Git Hooks is Husky. Pair it with tools like lint-staged, and instead of linting your entire project, you only format and lint the files you're actually committing. Your commits stay fast, and your team gets consistently clean code.
Git Hooks aren't limited to your own machine either.
Large organizations use similar automation across their development tools.
Atlassian, for example, tightly integrates products like Jira and Bitbucket.
You can automatically transition a Jira ticket when a Pull Request is merged, enforce approval rules before merging, or trigger downstream workflows without anyone having to remember another checklist.
The fewer things humans have to remember, the fewer mistakes humans make.
GitHub Actions
Remember in the Containerisation section how a Dockerfile is just a blueprint that Docker follows to build and run a container?
GitHub Actions work in almost the same way.
A workflow file (usually inside .github/workflows/) is simply a blueprint containing a list of commands you want GitHub to execute.
When a Git event happens (like pushing code, opening a Pull Request, creating a release, or merging into main), GitHub automatically spins up a temporary machine in the cloud, follows the instructions in your workflow file, runs every command one by one, and then throws that machine away once it's done.
The only difference is that instead of running those commands on your laptop, they're running on GitHub's cloud infrastructure (but you can also self-host them).
That's all a GitHub Action really is.
Github Actions is basically the implementation of CI/CD.
All the previous steps can be run through the commands mentioned in the workflow file of a Github Action. These can be:
- Installing dependencies.
- Checking formatting and linting.
- Running unit and end-to-end tests.
- Executing type checks.
- Building Docker images.
- Provisioning cloud infrastructure.
- Deploying preview environments.
- Uploading build artifacts.
- Talking to third-party API services.
- Starting, stopping, or cleaning up running resources after the workflow finishes.
In fact, almost every managed platform we talked about earlier, whether it's Vercel, Netlify, or larger cloud providers like AWS utilizes these workflows in one way or another.
The good news is that you rarely have to build everything from scratch.
The GitHub community has already created thousands of reusable Actions for the most common problems developers face. Need to set up Node.js? Deploy to AWS? Build a Docker image? Cache dependencies? Send a Slack notification? There's a good chance someone has already built it.
Most of them are freely available on the GitHub Marketplace, so instead of reinventing the wheel, you simply plug them into your workflow and let GitHub handle the heavy lifting.
But I'll highly encourage you to build one anyway to understand how it works.
Github has awesome documentation on it.
That's it for this one
If you like this article, consider following me on X at @Aadi__khare, I rant write about a lot of fun tech things there.
If you're a nerd like me and LOVE the tech drama insights, you'll enjoy my takes.
Until Next Time,
Happy Debugging Coding👋